ImageKit Integration
OVERVIEW
Base Image Proxy Generation
Before configuring ImageKit, it is worth understanding how Nomad Media handles images out of the box. All ingested images automatically receive two proxy outputs:
| Output | Default size | Format |
|---|---|---|
| Thumbnail | 300 × 300 px | JPEG (PNG files stay PNG) |
| Preview | 800 × 800 px | JPEG (PNG files stay PNG) |
Both are generated automatically on ingest, scaled to fit within their maximum dimensions while preserving the original aspect ratio. These proxies are used throughout the Nomad UI for grid views, lightboxes, and search results.
Adobe and PDF files: Adobe Illustrator and Photoshop files are not rendered from layers — Nomad extracts the embedded preview that Adobe applications include when saving, and scales it to the proxy dimensions. For PDFs, Nomad renders the first page as a thumbnail (encrypted or non-standard PDFs may not render successfully).
These base proxies are sufficient for most internal use cases. ImageKit extends this baseline with AI-powered smart cropping and dynamic on-the-fly image transformation for web delivery.
ImageKit Integration
This guide will help you with the configuration and integration of Nomad Media with ImageKit.
PREREQUISITES
1. Register an account
Please visit https://imagekit.io/registration/ and sign up for an account.
2. Configure External Storage Origin
In ImageKit dashboard, External Storage section, add a new external source. Enter a name, select Web Folder as origin type, and in base URL enter the full URL of your Nomad Media Content URL. This information will be provided by your Nomad Media support representative. See the capture below for details:
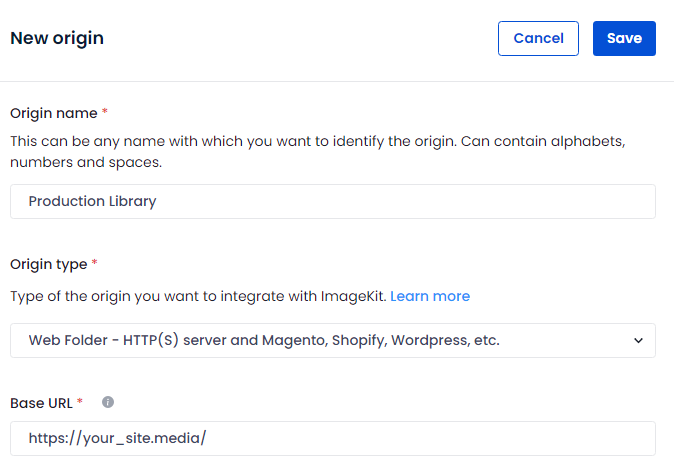
Usually the Nomad Media Content URL will be in the format of https://content.domain/
For more information about this configuration please see ImageKit documentation here.
3. Edit configuration files
In your AWS management console navigate to S3, find your system-system folder and edit the config.json file. Either locate the existing application/imageKitSettings section (or add it) and update the urlEndpoint to the value of your ImageKit URL Endpoint. You can find this value in your ImageKit dashboard.
ImageKit configuration settings section:
  "application/imageKitSettings": {
    "urlEndpoint": "<YOUR URL ENDPOINT>",
  },
Usually an ImageKit URL Endpoint will look like https://ik.imagekit.io/origin_id.
4. Rendering Profiles
The next section Screenshot Extraction and Image Rendering outlines how to set the profiles to generate various image renderings using the ImageKit integration.