Dolby Hybrik Integration
OVERVIEW
This guide will help with the setups, options and examples for integrating Nomad Media with Dolby Hybrik transcoding services.
PREREQUISITES
1. Obtain your credentials from Hybrik
To obtain your auth key and secret, on the Hybrik administrative portal navigate to Account / API Users and then click on the New API User button.
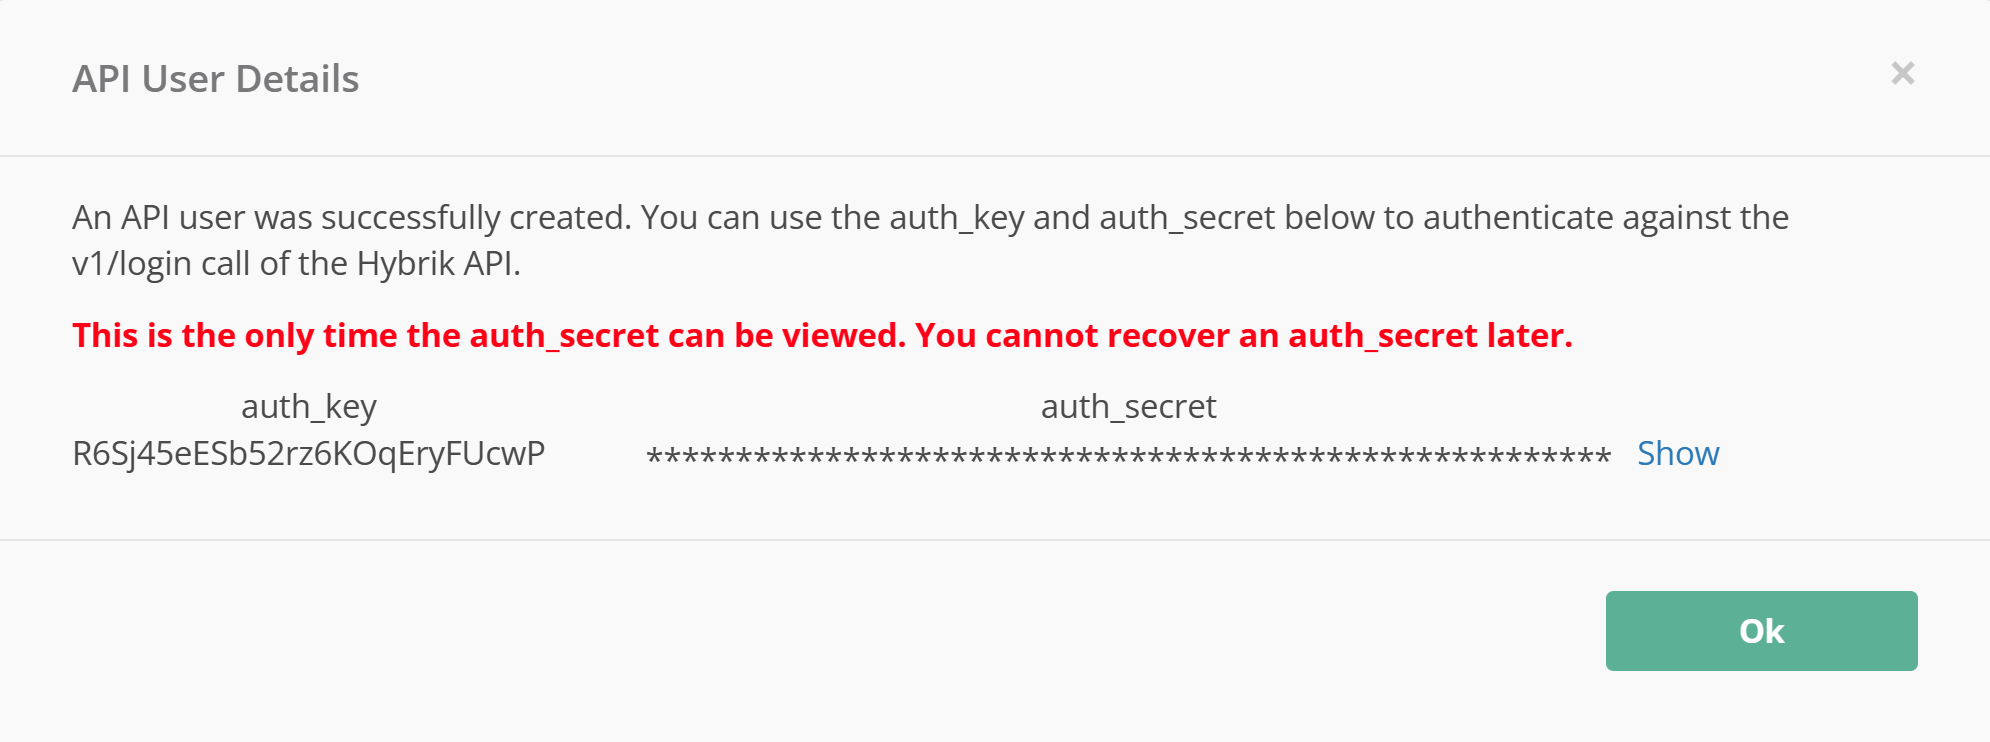
OAPI key and secret can be obtained only by Hybrik account owner.
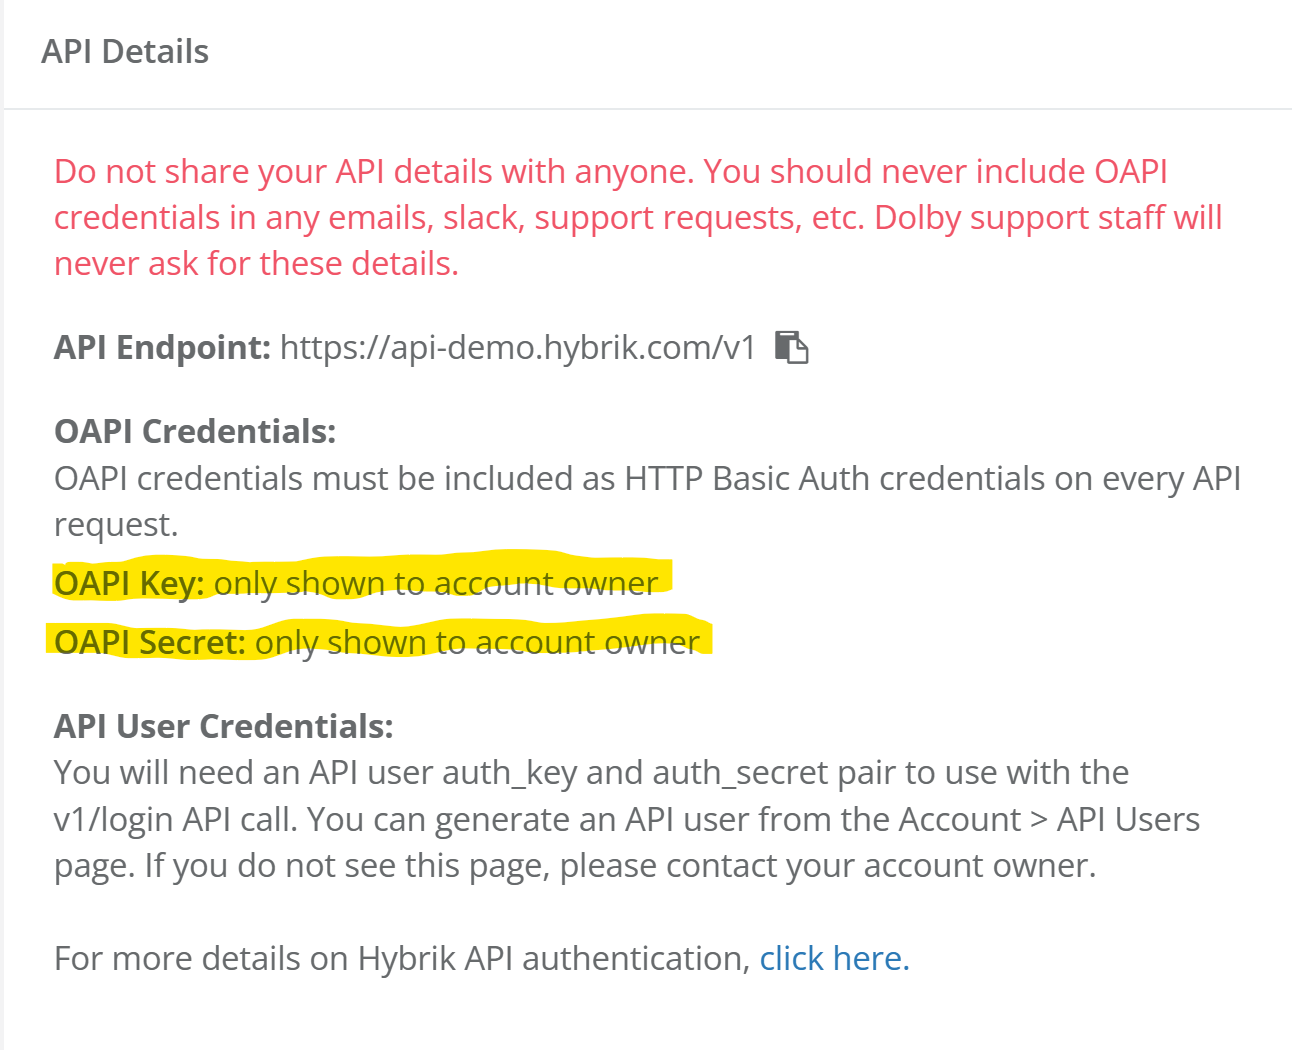
Please reach out to Hybrik or account owner if you cannot login to the administrative portal or obtain your auth or OAPI key and secret. See below for support information.
2. Create Hybrik secret in AWS Secrets Manager
In your AWS management console navigate to Secrets Manager and create a secret. Make a note of the name of your secret. It's recommended to name the secret nomad/{projectPrefix}/hybrikApiCredentials. By default, nomad secrets that start with nomad/{projectPrefix}/ can be accessed by the Nomad Media environment. Any other named secrets will need to have custom security IAM permissions added.
Here is example of what your secret key may look like.
{
    "auth_key": "xxxxxxxxxxxxxxxxxxxxxxx",
    "auth_secret": "xxxxxxxxxxxxxxxxxxxxxxx",
    "oapi_key": "[email protected]",
    "oapi_secret": "xxxxxxxxxxxxxxxxxxxxxxx"
}
The keys and secrets above must match what Hybrik provided for you.
3. Edit configuration files
In your AWS management console navigate to S3, find your system-system folder and edit the config.json file. Locate the application/hybrikSettings section and update the authCredentialsSecretName and set the value to the name of the secret that was added in the previous step. See below on all the configuration options available.
 "application/hybrikSettings": {
    "authCredentialsSecretName": "nomad/dev-05/hybrikApiCredentials",
  }
Next, in the same configuration and the same section add the config that is endpoint of the Hybrik API. Default value is https://api-demo.hybrik.com/v1.
"application/hybrikSettings": {
		"apiRootUrlAddress": "https://api-demo.hybrik.com/v1"
}
Next, in the same configuration and the same section add the config that is location of the Hybrik templates as a S3 URL.
Make sure the config value contains "{jobTemplateId}" token.
"application/hybrikSettings": {
		"jobTemplateS3UrlTemplate": "s3://nomad-dev-05-system-system-1o15kdsyovkyw/templates/hybrik/{jobTemplateId}.json"
}
Next, in the same configuration file locate the application/transcodeSettings/profiles section add the config that represents the transcoding profile.
Make sure the config value contains "transcoder" attribute specifying the "Hybrik" as a value. The transcoding service is selected based on this attribute i.e. if "Hybrik" is not set as "transcoder" the job is not going to be delegated to the Hybrik unless it is set as a default transcoder.
Default TranscoderThe default transcoder is specified in the config.json file at the application/transcodeSettings section's defaultTranscoder attribute (see below).
Job Template IdThe "{jobTemplateId}" token mentioned for previous config is going to be substituted with value specified in "templateName" attribute in the config below. For a given example above and for "dev-05-apple-hls" templateName, the jobTemplateS3UrlTemplate would resolve to "s3://nomad-dev-05-system-system-1o15kdsyovkyw/templates/hybrik/dev-05-apple-hls.json".
	"application/transcodeSettings": {
		"processingProfile": "dev-05-default",
                "defaultTranscoder": "MediaConvert",
		"profiles": [
			{
				"templateName": "dev-05-apple-hls",
				"transcoder": "Hybrik",
				"format": "hls",
				"title": "Apple HLS",
				"enabled": true,
				"slug": "apple-hls",
				"isSegmentedRule": "HasVideo == true and videoDurationSeconds >= 600"
			},
			{
				"templateName": "dev-05-default",
				"transcoder": "Hybrik",
				"format": "mp4",
				"rule": "HasVideo == true and (FileExtension != '.mp4' and FileExtension != '.webm') or VideoWidth > 1920 or VideoHeight > 1080",
				"title": "MP4 Proxy",
				"enabled": true,
				"slug": "mp4-proxy",
				"videoBitRate": 2000000,
				"width": 1920,
				"audioBitRate": 96000,
				"isSegmentedRule": "videoDurationSeconds >= 600"
			},
			{
				"templateName": "audio-proxy",
				"transcoder": "Hybrik",
				"format": "mp4",
				"rule": "HasVideo == true and FileExtension != '.mp3' and HasAudio == true",
				"title": "MP3 Proxy",
				"enabled": true,
				"slug": "mp3-proxy"
			}
		]
	},
Video Based ProfilesPlease ensure that all video-based profiles include "HasVideo == true" criteria in its "rule" attribute (see above). If that is omitted, audio-only assets will fail transcoding due to the improper match with the video-based profiles.
4. AWS Credentials
Navigate to Account / Credentials Vault and then click on the New Credentials button.
Specify type as "AWS", provide Access Key ID, Secret Access Key obtained from AWS management console. Also specify Api Key.
Using these credentials Hybrik will access S3 delivering transcoded assets and send notifications through the AWS SNS.
Make sure the provided credentials have necessary permissions to write and delete from the S3 locations where Hybrik delivers. This is normally only the metadata bucket deployed as part of the Nomad Media installation.

In your AWS management console navigate to S3, find your system-system folder and edit the config.json file. Locate the application/hybrikSettings profiles section and add the config that represents the reference to Hybrik credentials vault entry.
Make sure the config value is the same as the one entered in Api Key of Edit Credentials in Credentials Vault.
 "application/hybrikSettings": {
    "credentialVaultKey": "demo_cred",
  }
5. Configuring Notifications
In order for the Hybrik to notify when a job status is changed, a notification has to be configured on the Hybrik administrative portal. Configuring a notification involves defining AWS Simple Notification Service topic, credentials to use when authenticating to AWS and the type of notifications.
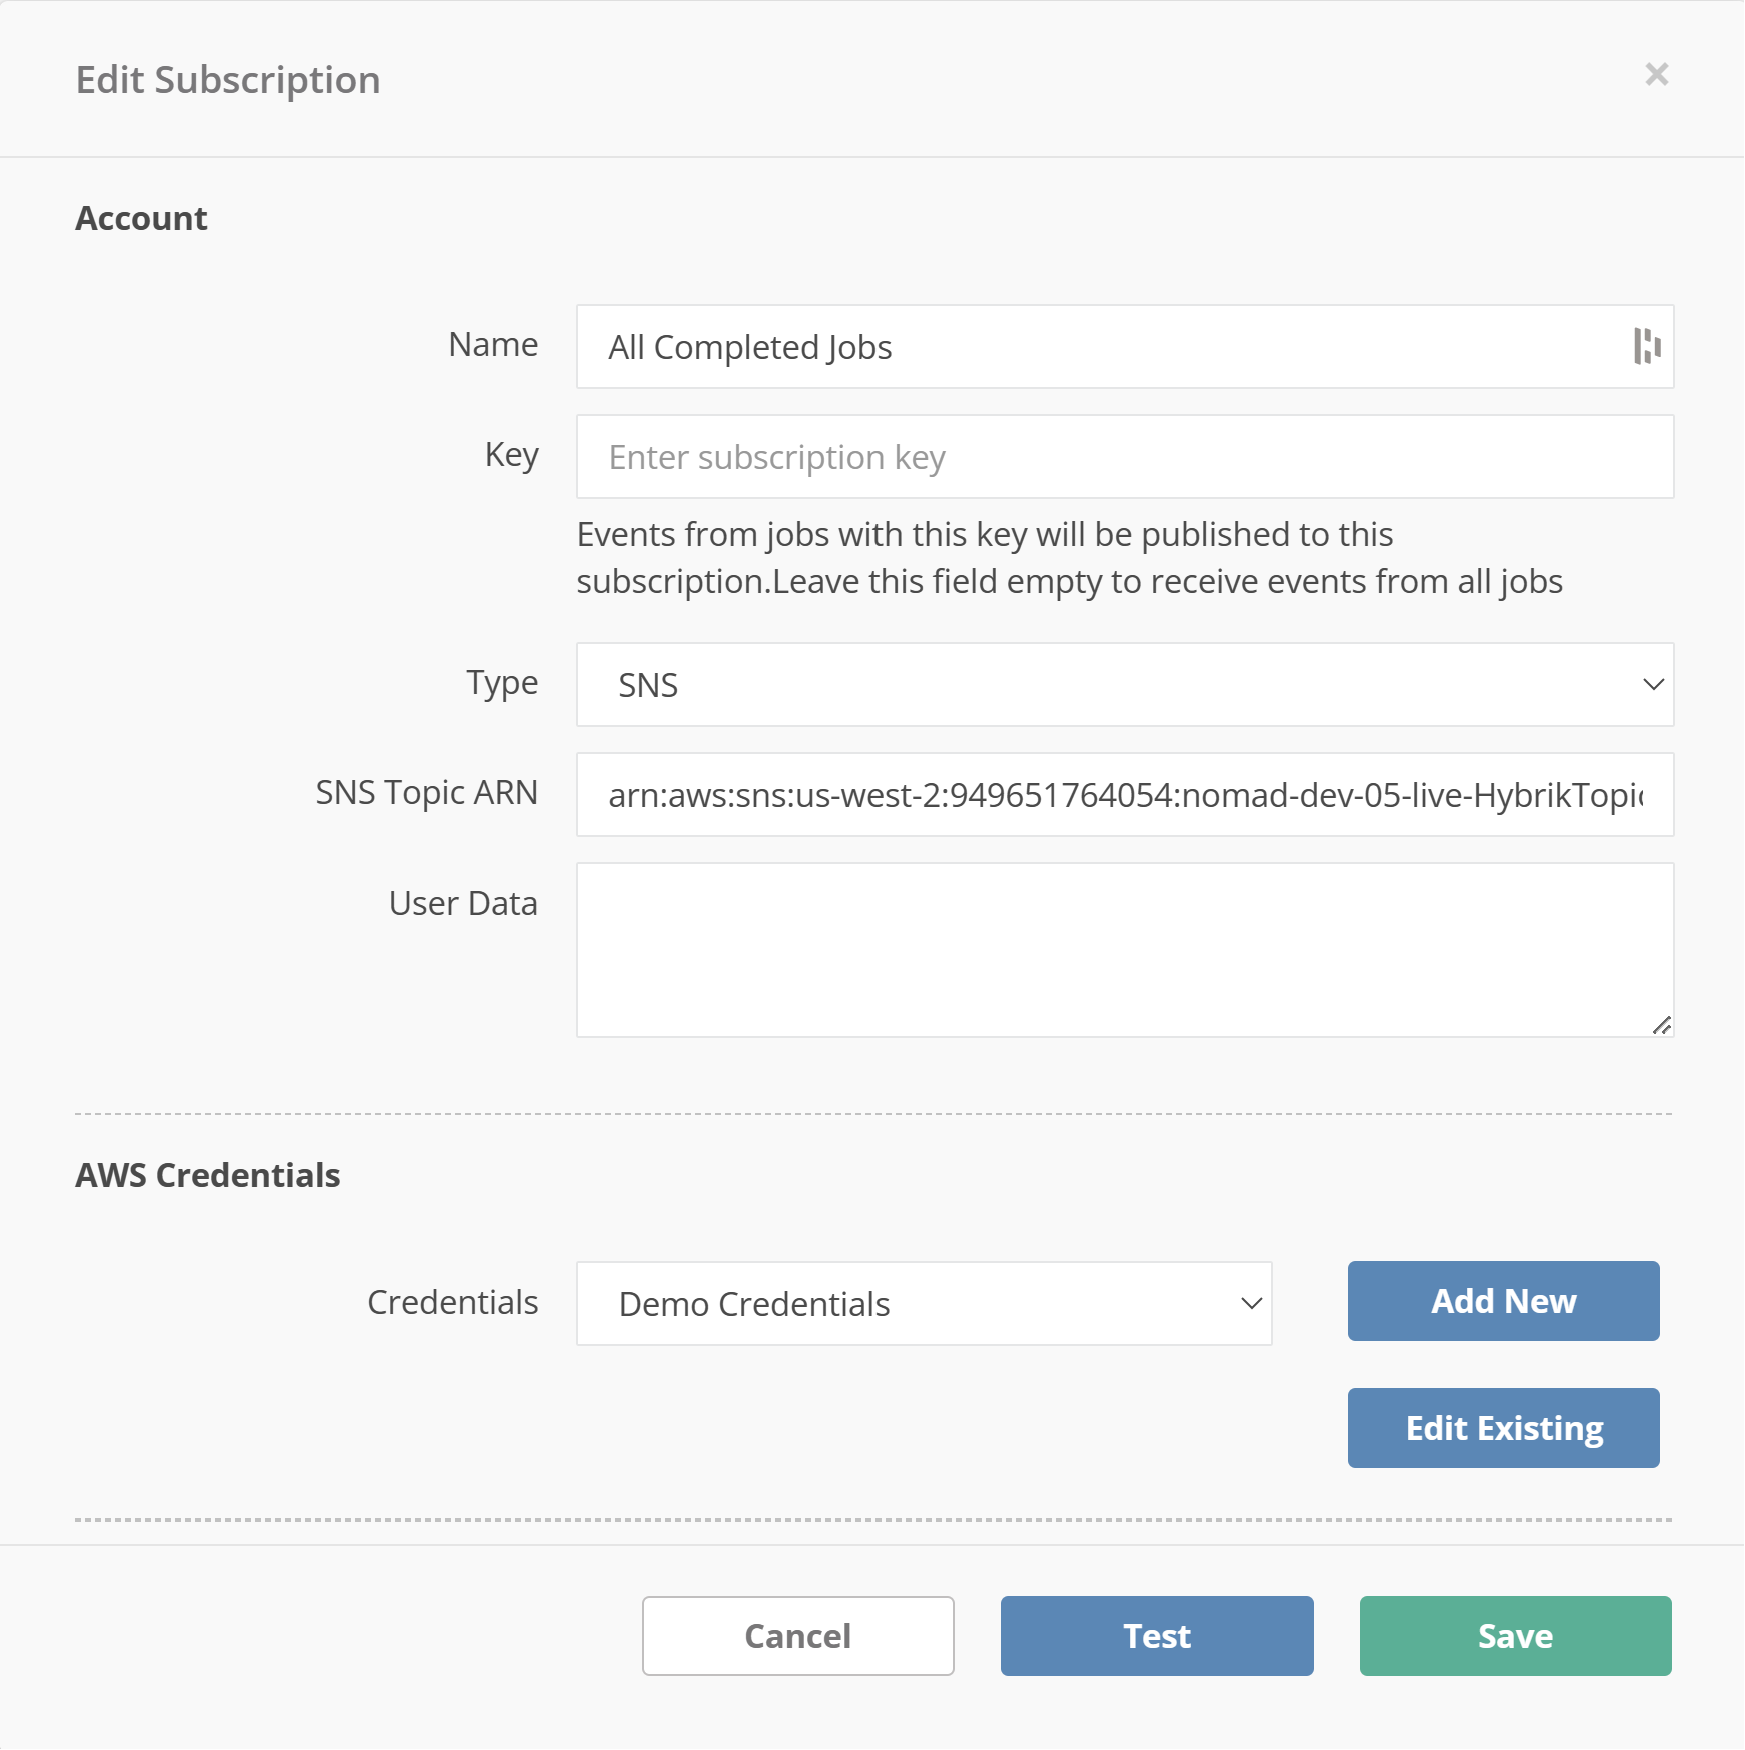
Navigate to Account / Notifications and then click on the New Subscription button.
Specify type as "SNS", provide SNS Topic ARN obtained from AWS management console. Also specify Credentials selecting those with Api Key matching the one set in config.json.
Make sure that Key and User Data are left empty.
Using this subscription Hybrik will try to send a notification through the AWS SNS.
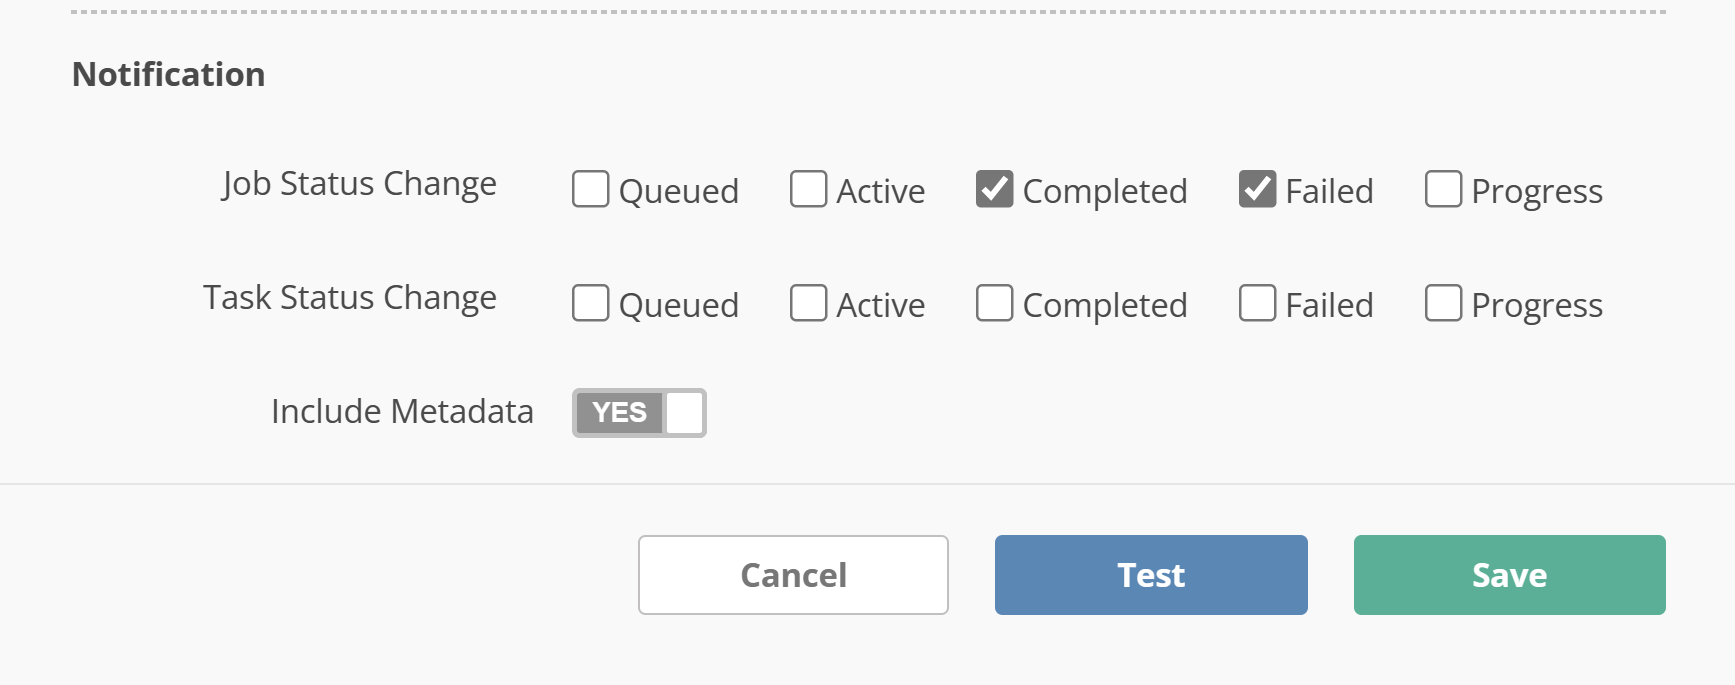
Scroll to the bottom and check Completed and Failed as Job Status Change. Also toggle Include Metadata to Yes.
Make sure you do not check any other notification type.
Next, in the same configuration and the same section like in previous section, add the config that is SNS topic ARN.
 "application/hybrikSettings": {
    "snsTopicArn": "arn:aws:sns:us-west-2:949651764054:nomad-dev-05-live-HybrikTopic",
  }
Hybrik Support Information
For obtaining your auth and oapi keys and secrets the preferred use is one of these following methods below:
- website: contact hybrik
To see the status of the Phenix system, please visit here
Hybrik documentation located here