Custom UI Integration
A roadmap for integrating your own front-end UI with the Nomad Media platform using a Shim API layer.
Welcome to the Nomad Media UI Integration Guide. This covers a conceptual approach to successfully integrating a front-end UI with the Nomad Media platform.
Nomad Media is a full-featured content and media asset management platform that provides direct access to your AWS-hosted assets, live streams, and metadata through RESTful APIs. While you can call Nomad Media's native APIs directly, experience shows that the best path is to create Shim Layer APIs — optimized intermediary APIs tailored to your UI's exact needs.
Here is the integration roadmap:

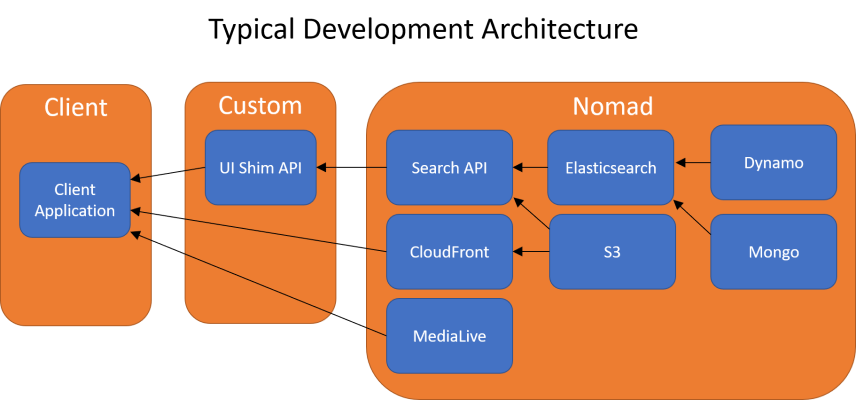
The big picture production architecture:
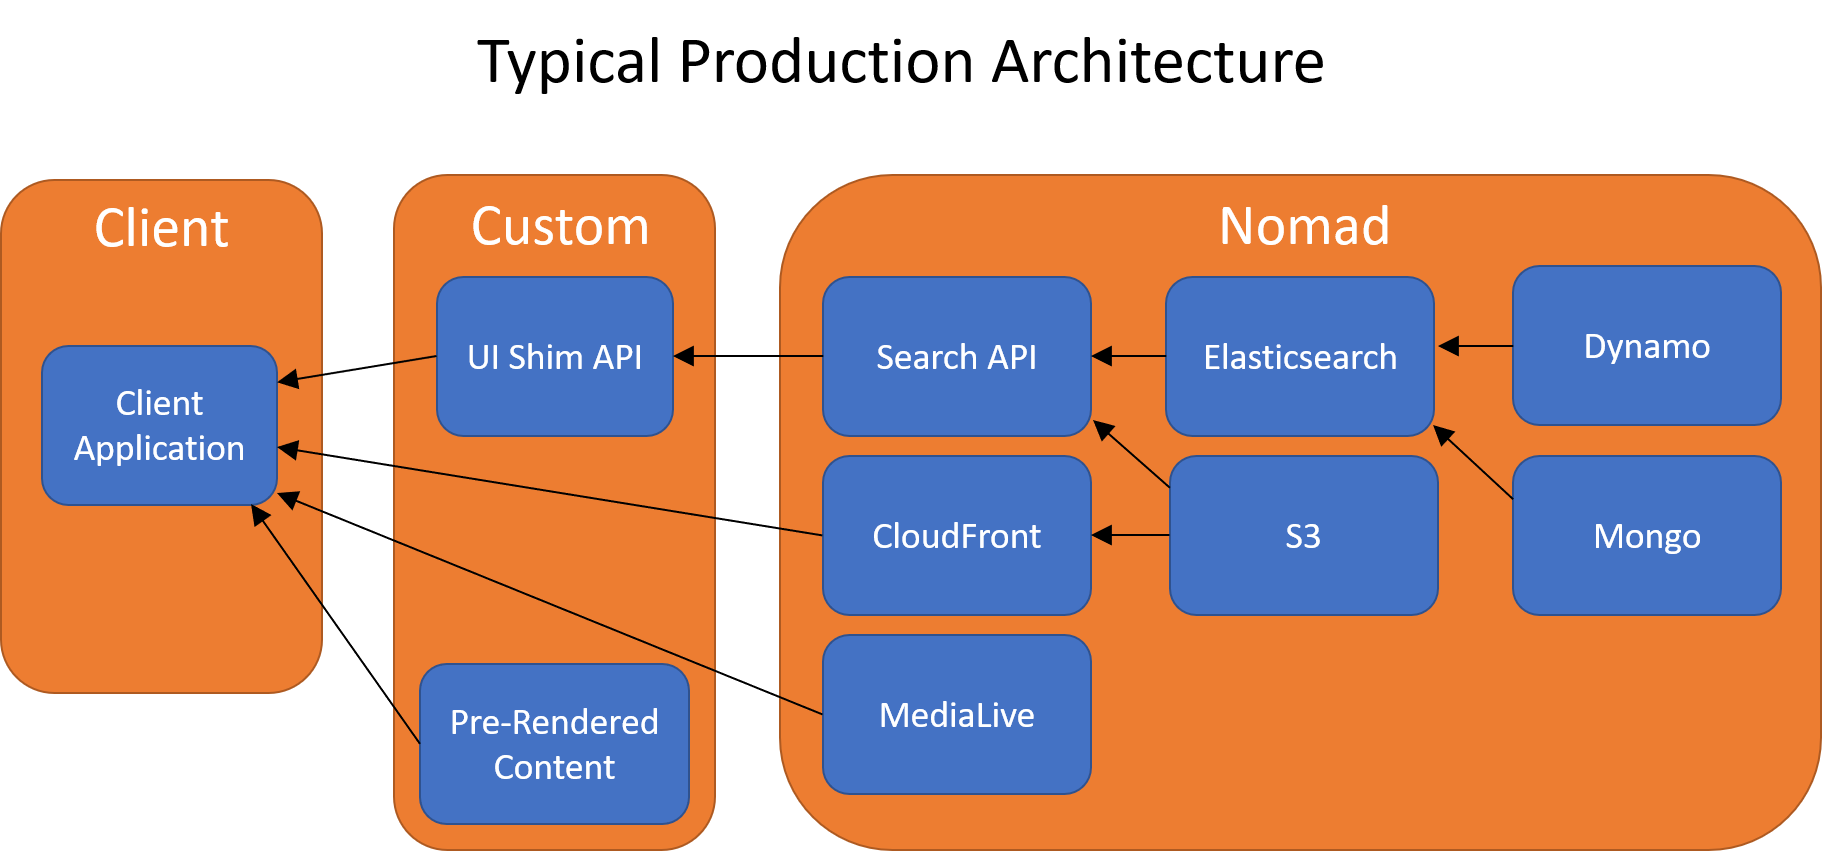
The diagram above shows a client application (UI) being served content via pre-rendered pages, an optimized Nomad Media Shim API layer, and direct connections to content delivery systems managed by Nomad Media.
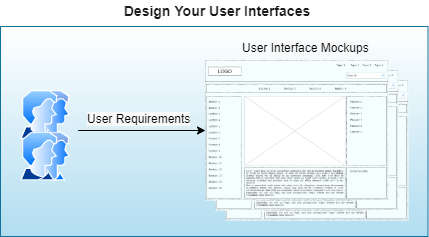
Step 1 — Design Your UI and Capture Requirements
Define your UI design pages with data element placements and controls. This clarifies the data structure your UI needs before you write any API code.
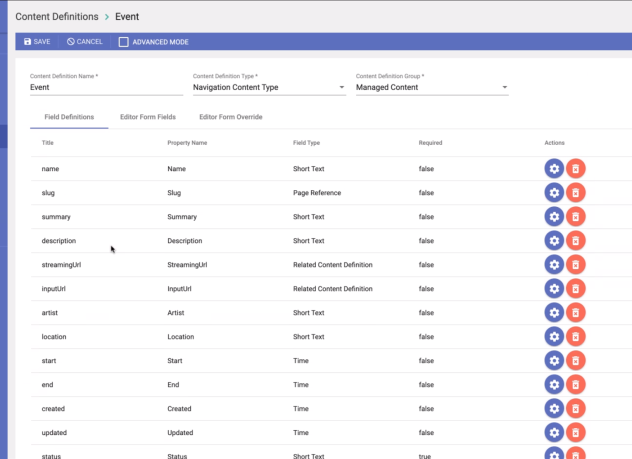
Step 2 — Create a Data Model Inside Nomad Media
Define a data model (content definition) inside Nomad Media that represents your UI's data needs — fields, properties, and schema.
Example: a "Live Event" data model in Nomad Media:
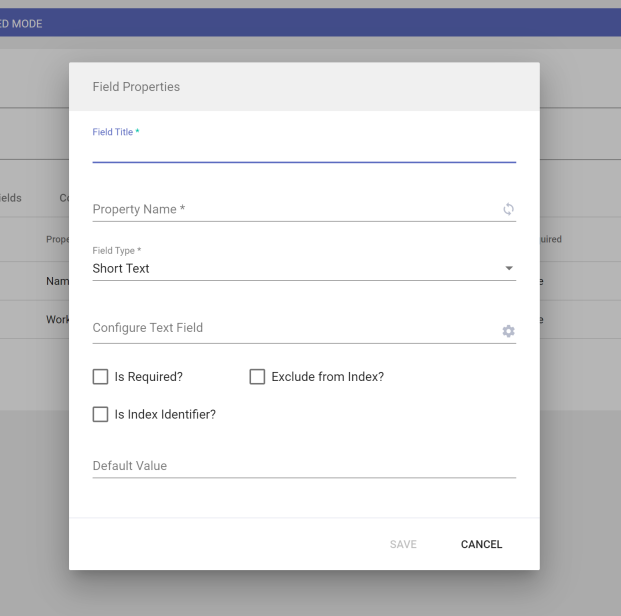
Adding a new field to a data model is straightforward:
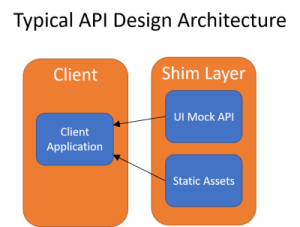
Step 3 — Create Shim APIs
A Shim API is a thin, optimized code layer that takes requests from the UI and interfaces with Nomad Media's native APIs, returning only the data the UI needs.
Recommended approach: Build Shim APIs against mock JSON data first. This allows UI development and backend API development to proceed in parallel without blocking each other. Switching from mock data to live Nomad Media API responses is a simple URI change once both sides are ready.
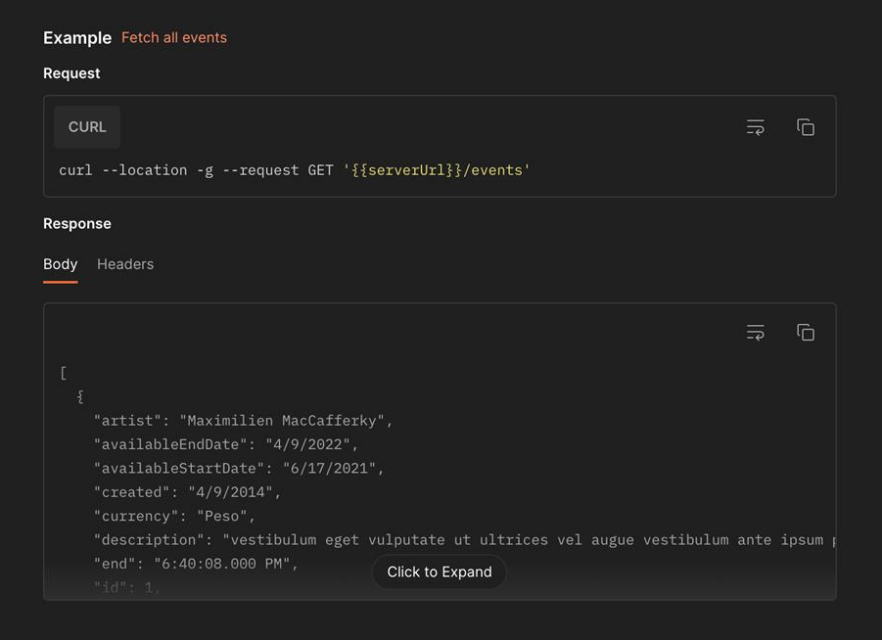
Example: a "Live Event" Shim API that interfaces with the "Live Event" data model above:
Step 4 — Connect to Nomad Media
When your UI is stable and your content and Nomad Media configurations are ready, update the Shim APIs to call Nomad Media directly instead of mock data. Because the same data model has been used throughout, a URI change in your Shim APIs is all that's needed.
You'll need to execute a Nomad Media login to authenticate API calls. See Authentication for details.
Note: Calling Nomad Media APIs directly during UI development (without a Shim layer) is also supported, though the Shim approach is recommended for production optimization.
At this stage, Nomad Media is operational and all AWS services are available, but performance optimizations (caching, etc.) have not yet been applied. This is a good time to apply output specifications through Nomad Media — for example, configuring AWS Elemental MediaConvert transcoding profiles and MediaPackage output formats.
Step 5 — Optimize for Production

Once the system is verified, optimize for production. Nomad Media is built on AWS, so you can tune factors like caching of commonly requested content to improve response times under load.
Step 6 — Launch
Deploy to your user base.